From Notebooks to AI – A Receipt Scanner for the Whole Team
For years, expense tracking in this small construction subcontractor was done by hand in paper notebooks. I first moved the process to Google Sheets to minimize costs, then to QuickBooks for better bookkeeping — only to run into new bottlenecks. The solution? A custom webapp that lets anyone, from field laborers to admin staff, scan receipts and send them straight into QuickBooks without manual entry.
Problem & Background
The early days:
- All expenses logged in physical notebooks.
- Receipts stored in boxes or as random phone pictures “just in case.”
My first step:
- Moved the process to Google Sheets to eliminate paper and reduce errors.
- Chose Sheets because QuickBooks was expensive and charged for almost every extra feature.
The move to QuickBooks:
- Suggested QuickBooks to improve bookkeeping and reporting.
- Quickly discovered a major limitation: field workers couldn’t scan/upload receipts without being given elevated account privileges — a security risk.
The remaining pain points:
- Field laborers had to text pictures of receipts to the admin.
- Admin retyped every expense into QuickBooks.
- No single streamlined flow for both admins and field staff.
Motivation
I wanted a single, secure system where anyone in the business — in the office or on a job site — could scan a receipt, have it processed automatically, and see it in QuickBooks without bottlenecks or security compromises.
Goals
- Allow both field workers and admins to upload receipts securely.
- Use AI to extract receipt details automatically.
- Push expenses to QuickBooks without giving workers elevated access.
- Reduce admin workload and eliminate duplicate data entry.
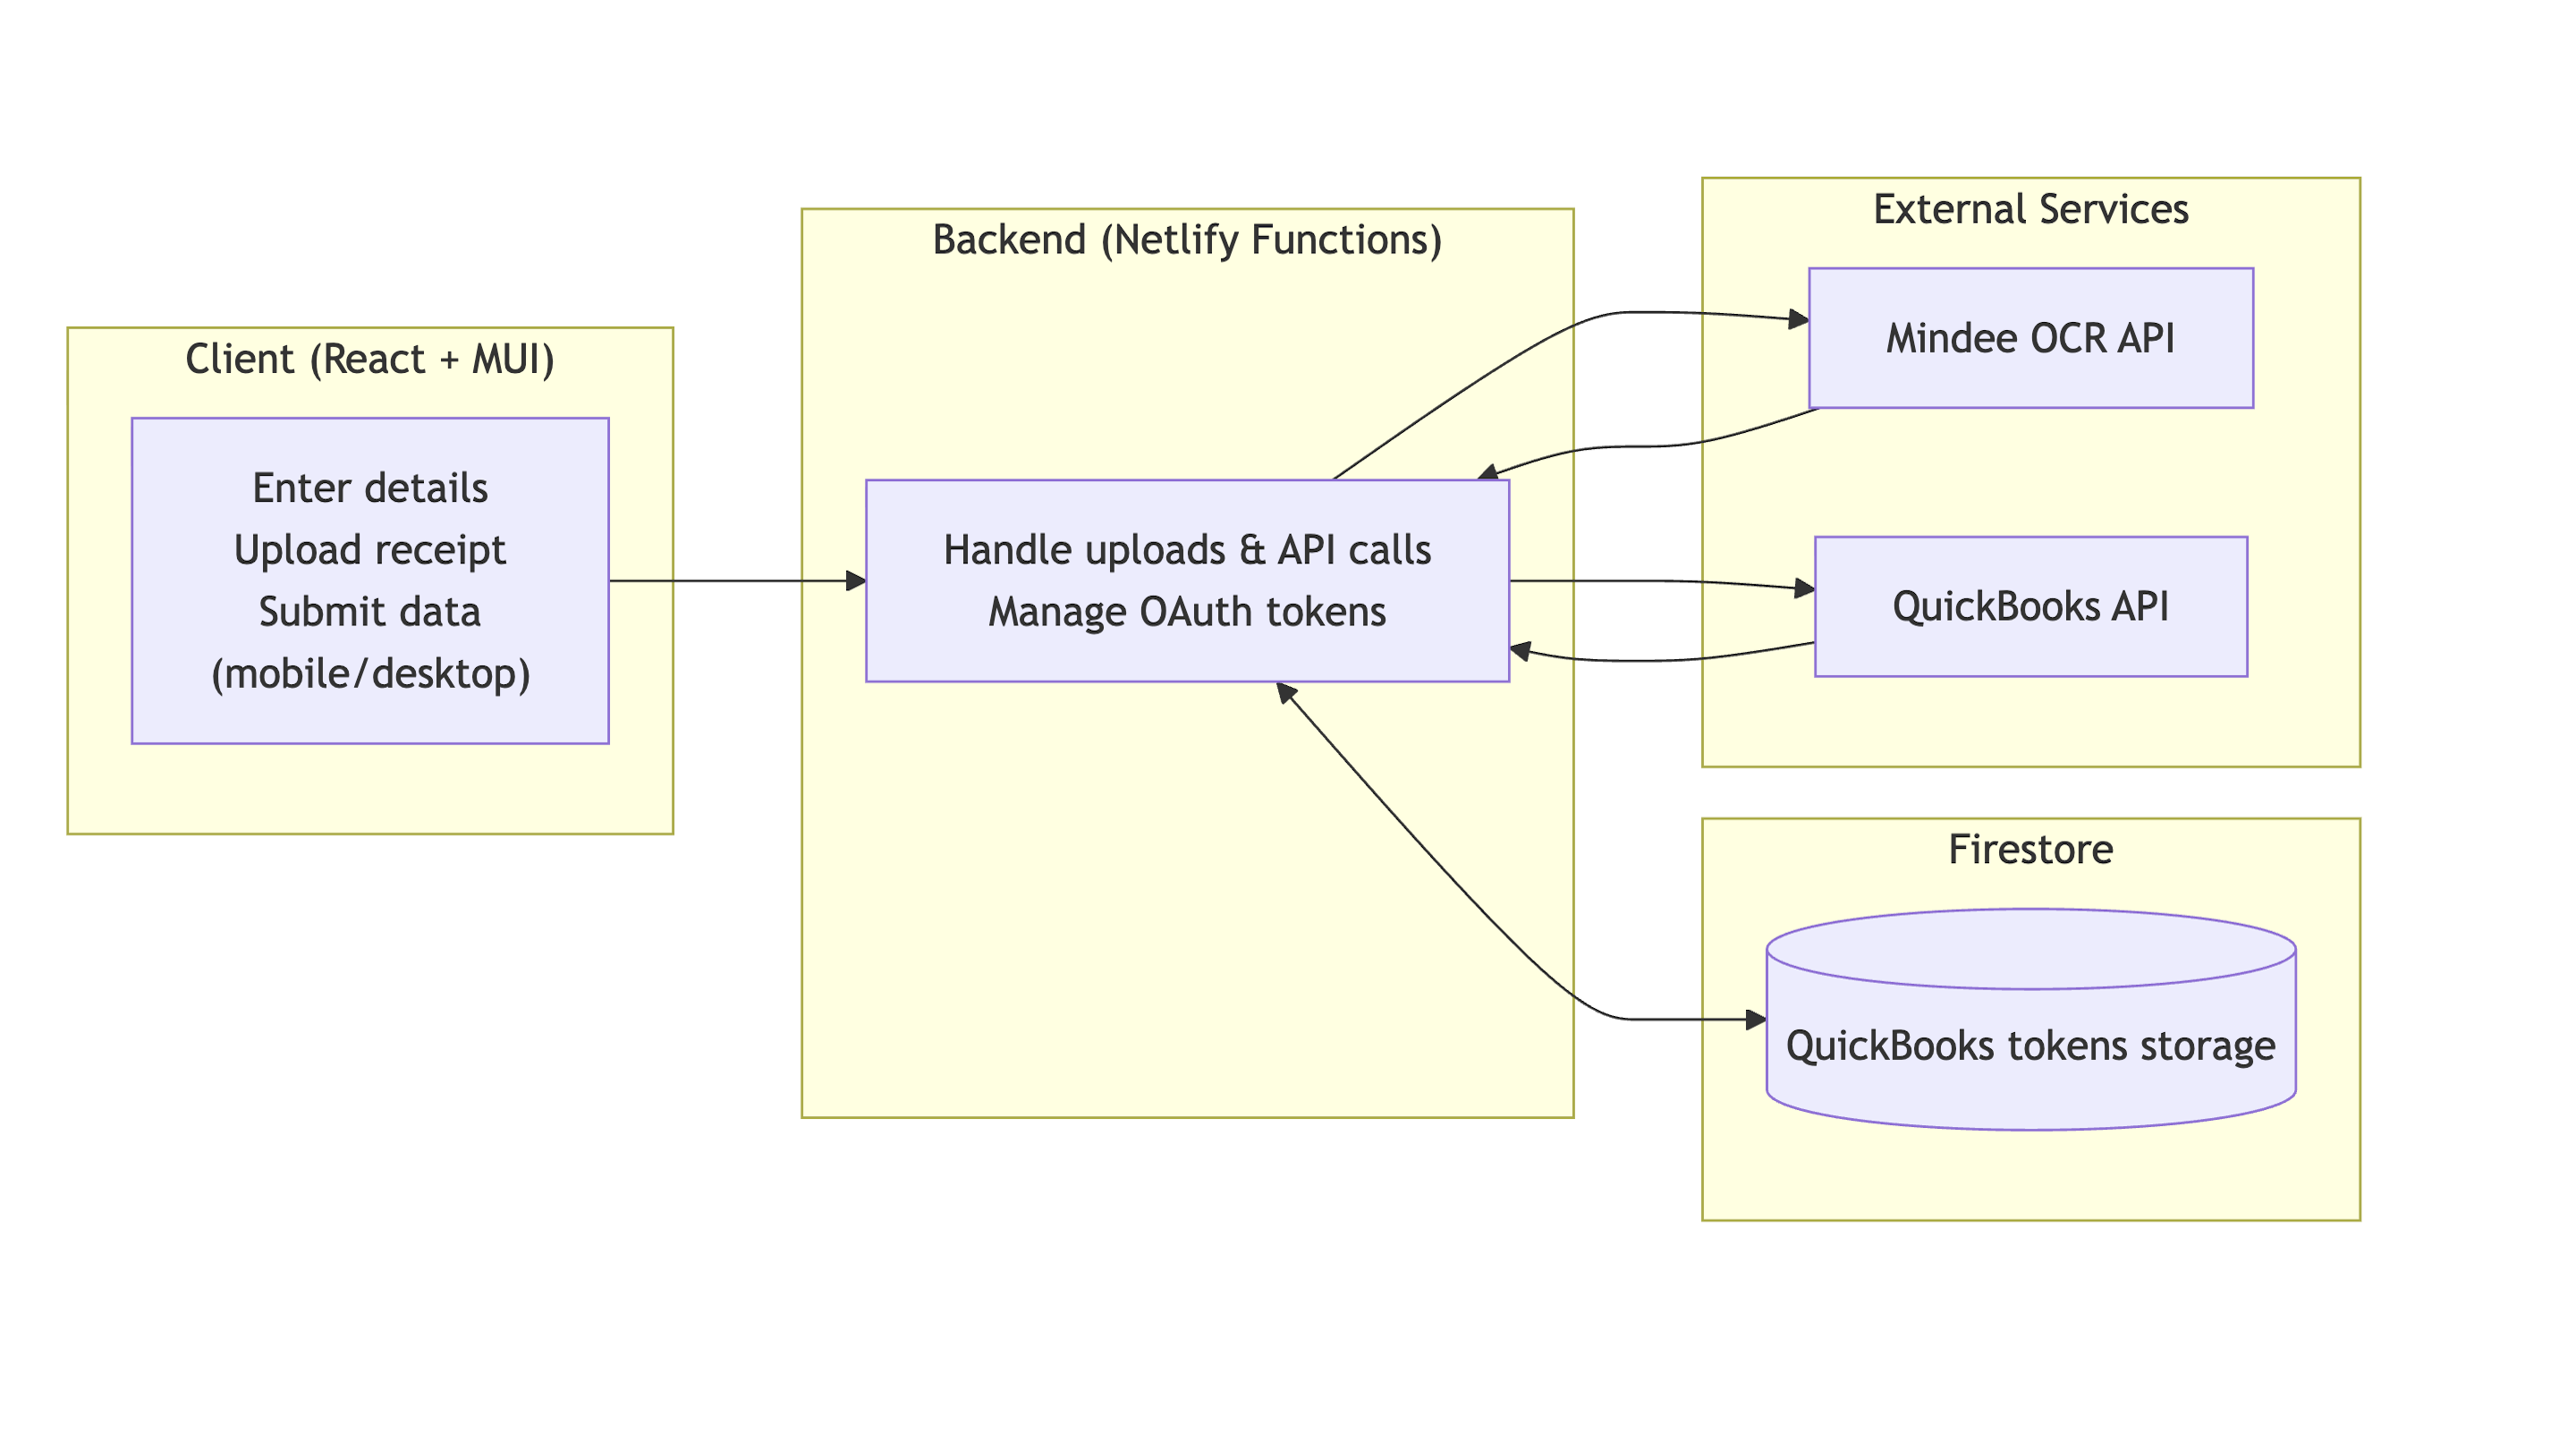
Solution Overview
The webapp provides a mobile-friendly upload form for workers in the field and an equally simple interface for office staff. Each receipt is processed using Mindee’s OCR API to extract vendor, amount, date, and category. The structured data and the original receipt image are then sent to QuickBooks through a secure backend (Netlify Functions) that stores and refreshes QuickBooks OAuth tokens in Firestore, attaching the image directly to the created expense for complete auditability.
Tech Stack:
- Frontend: React + MUI – mobile and desktop friendly.
- Backend: Netlify Functions – handles OAuth, API calls, and token refresh.
- Database: Firestore – secure token storage.
- AI Processing: Mindee API – OCR tuned for receipts.
- Accounting Integration: QuickBooks API – creates expenses and attaches receipt images in real time.
- Deployment: Netlify – hosting for both frontend and backend.
Feature Walkthrough
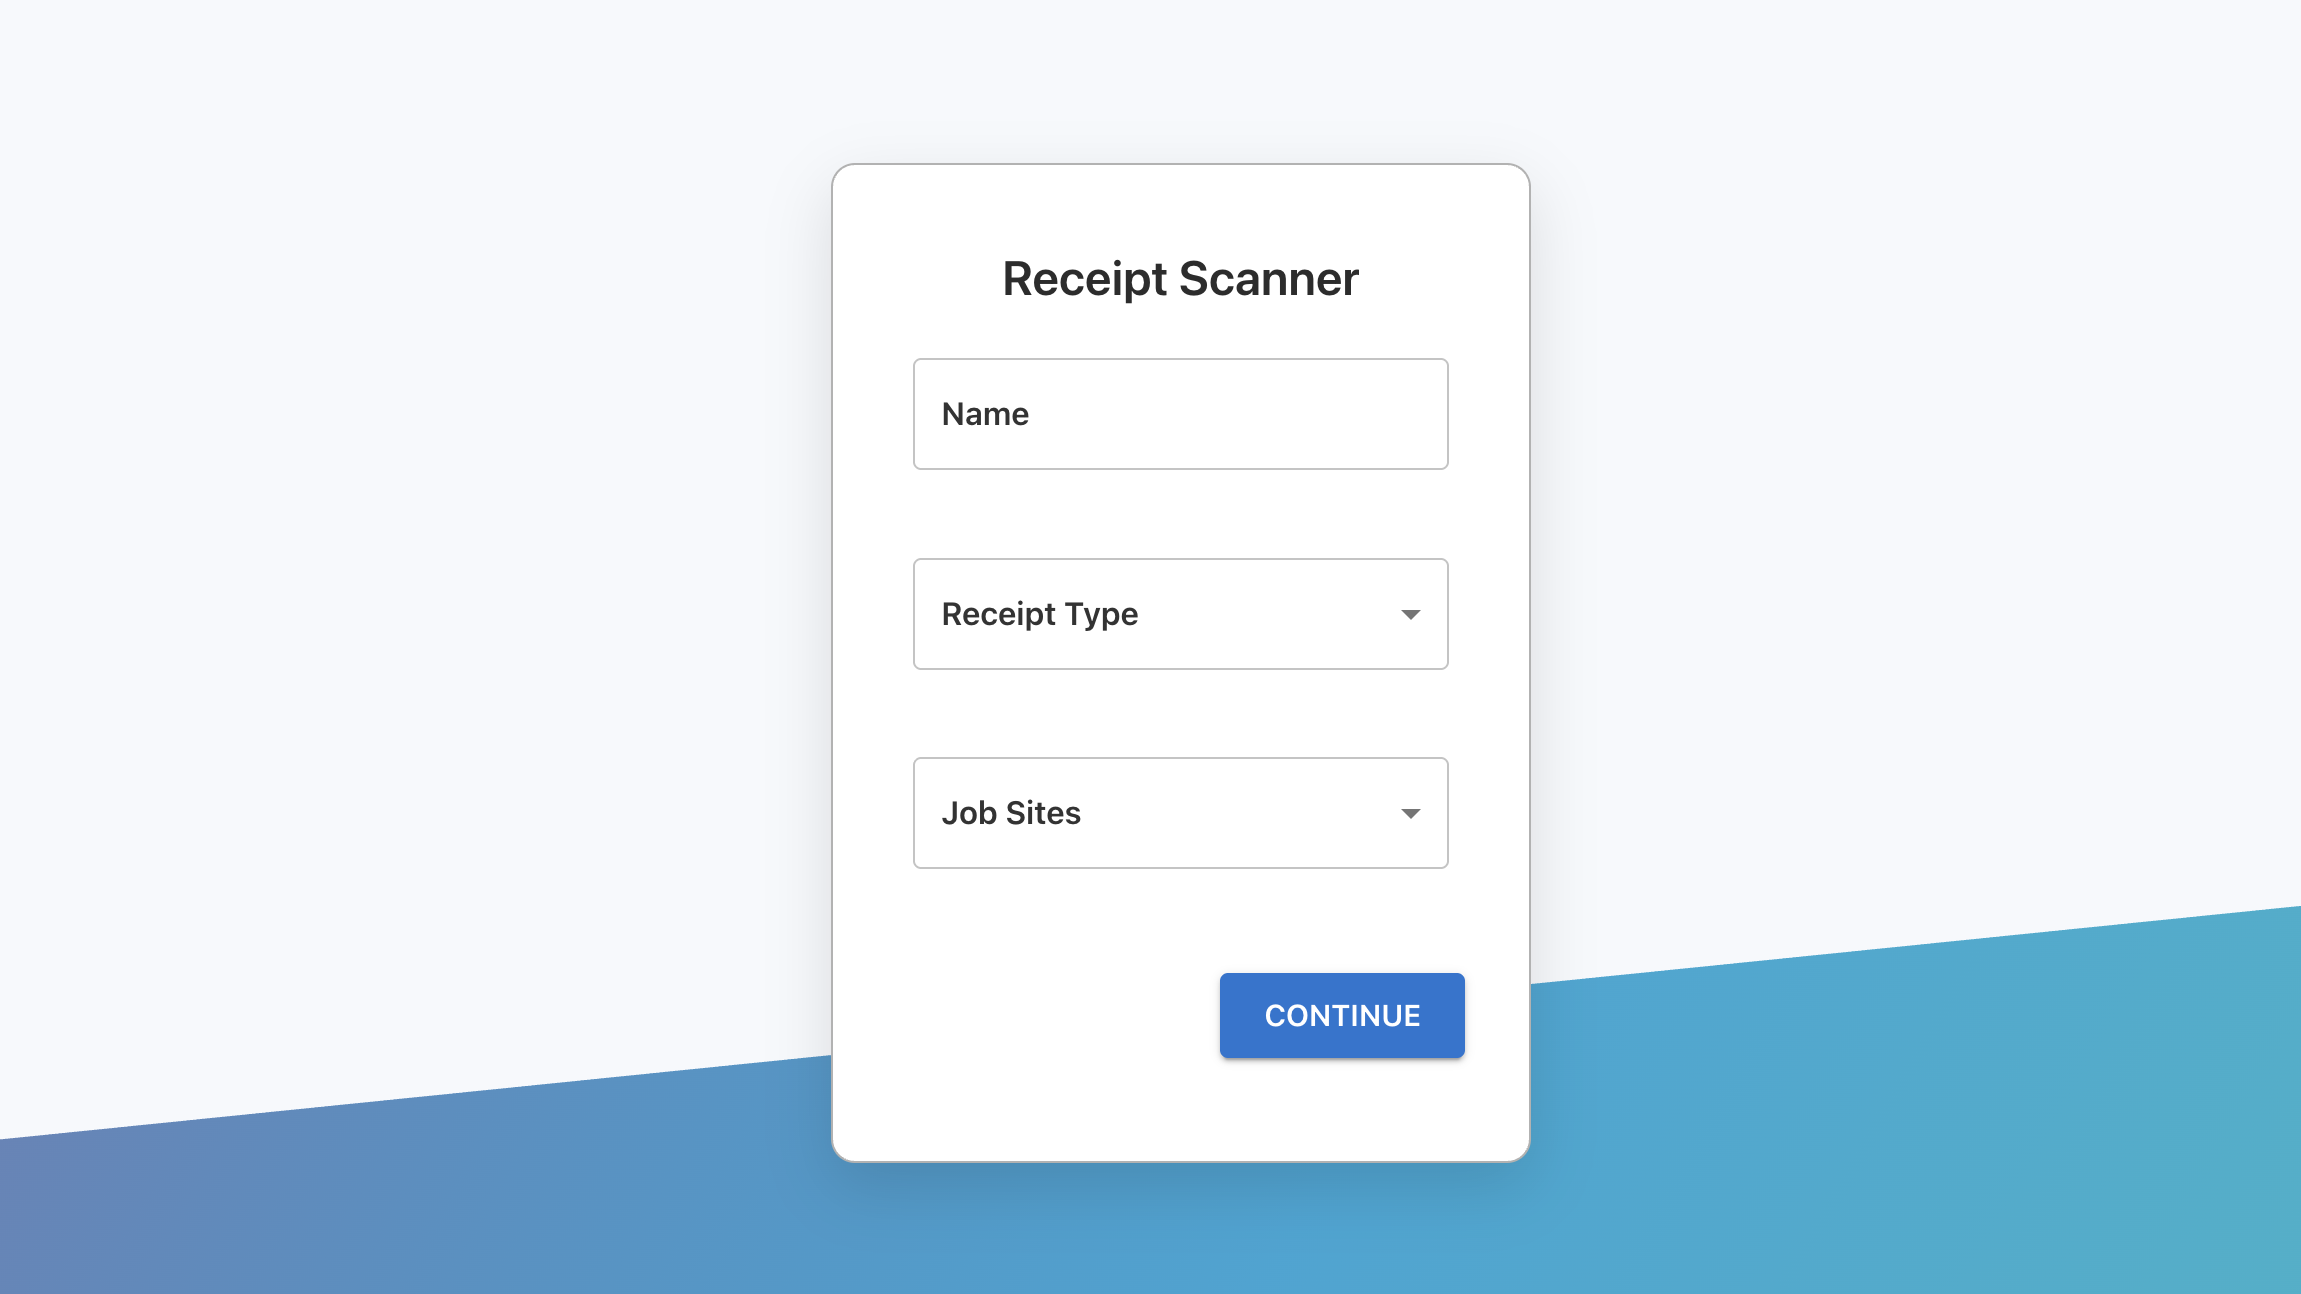
Step 1 – Enter Receipt Details
Before uploading a receipt, the user enters their name, selects the receipt type (e.g., tool rental, materials), and chooses the job site the expense is for.
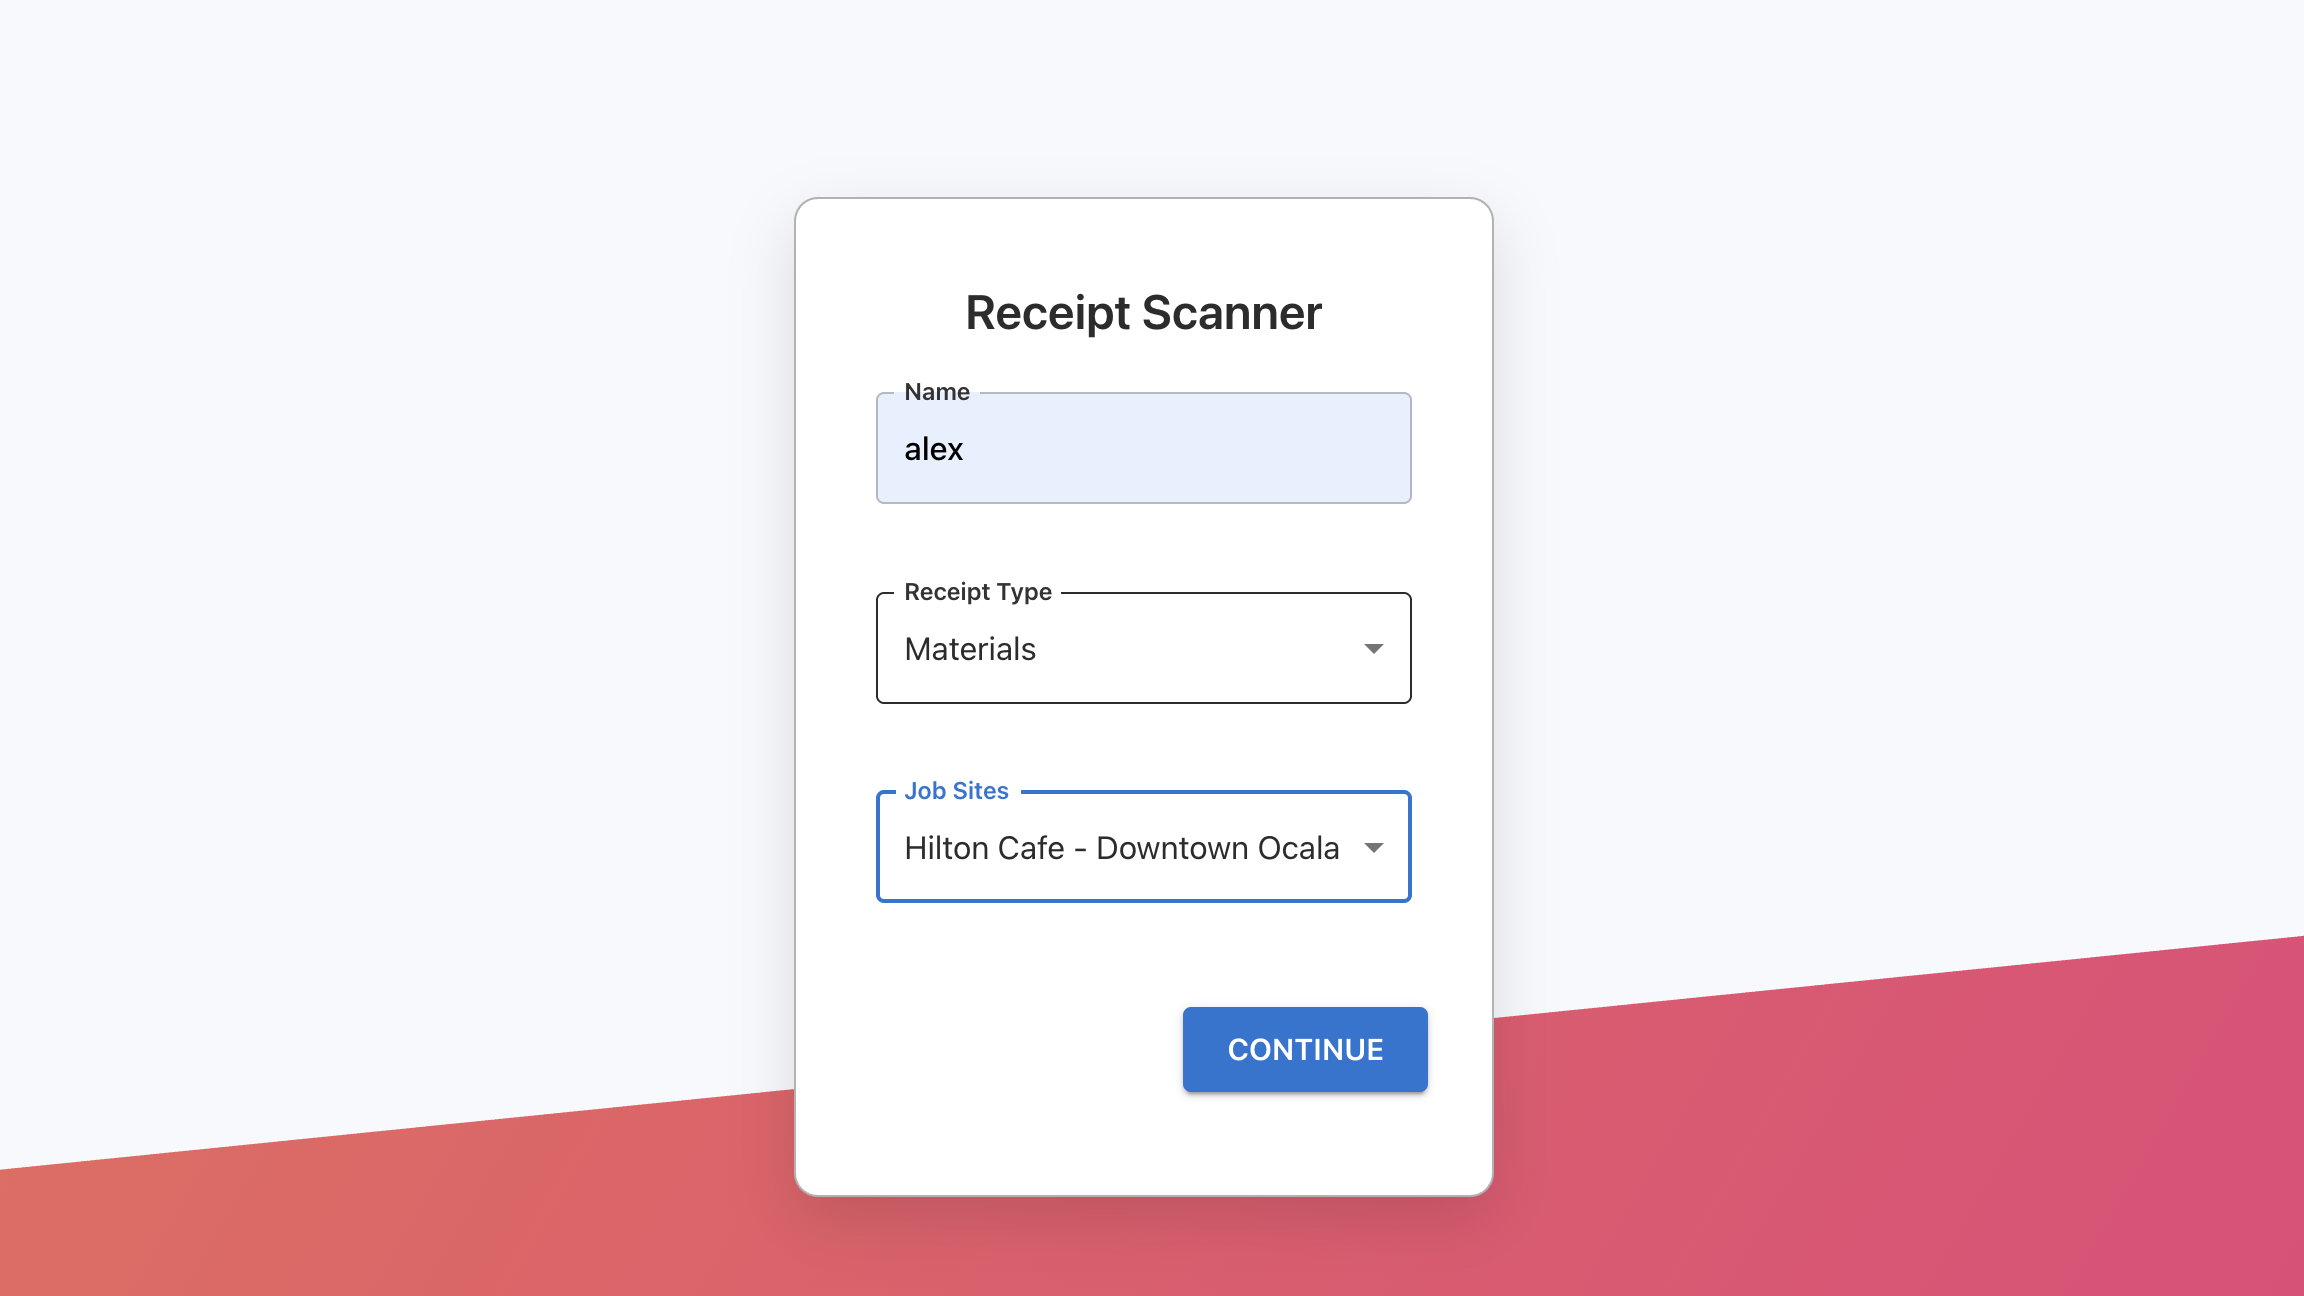
This ensures every expense is tagged with the right person, category, and location before it’s processed — saving time for bookkeeping and reducing misclassification.
Step 2 – Upload a Receipt
After entering the basic details, the user is prompted to upload a photo of the receipt from their phone or computer.

Step 3 – AI Parsing
The uploaded receipt is processed by Mindee’s OCR API, which extracts key data like vendor, amount, and date.
The parsed information is displayed to the user for confirmation.
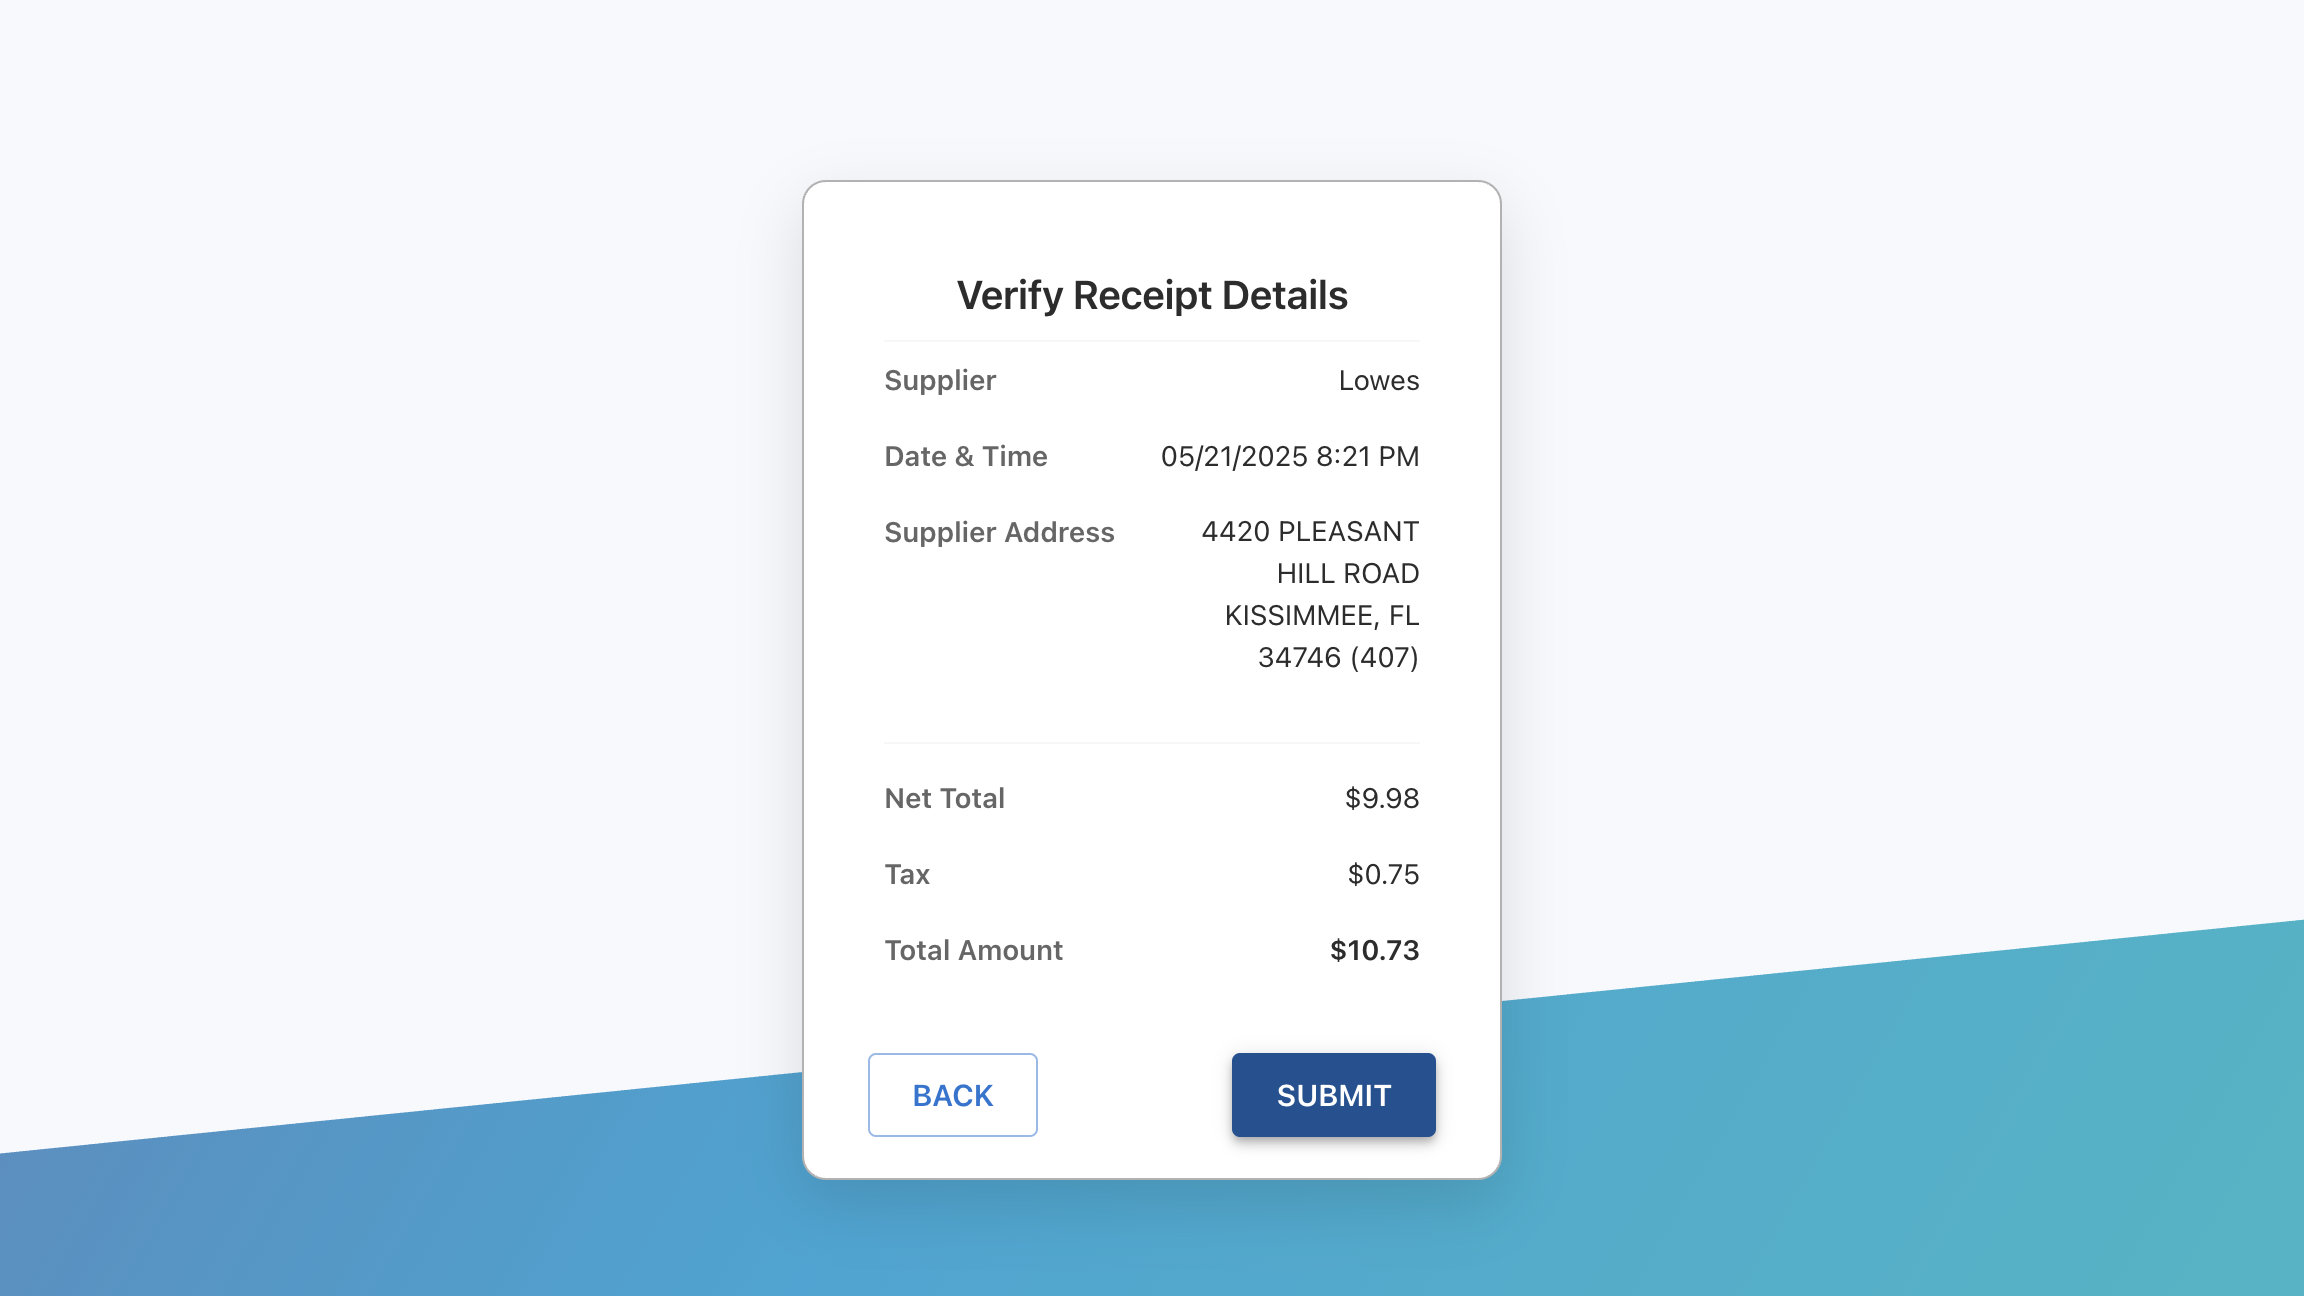
Step 4 – Submit to QuickBooks
Since Mindee’s accuracy is high, there’s no in-app editing step — if something looks wrong, the user can simply retake the picture.
Once submitted, the expense and the receipt image are sent to QuickBooks immediately, with the image attached to the transaction for easy reference and auditing.


Challenges & Solutions
- Security: No elevated QuickBooks access for workers → secure backend endpoints in Netlify Functions handle all QuickBooks API calls.
- Cost constraints: Early stage used Google Sheets to avoid SaaS costs → migrated only when QuickBooks became necessary.
- Deployment: Needed a single hosting solution → Netlify for both UI & backend functions.
Results & Impact
- Reduced admin data entry time by ~40%.
- Field and admin staff now use the same process.
- Eliminated insecure sharing of QuickBooks credentials.